# JaxCore - Documentation

This is the detailed documentation for JaxCore, its structure and how to build a module for JaxCore along with handy tricks used while coding modules for JaxCore (or any Rainmeter skin).

### I am a [JaxCore user](/getting-started/introduction)

### I am a skin developer looking for [tips and tricks](/coding-a-module/code-formatting)

### I am here to learn how to [use Core to make modules / widgets](broken://pages/vh7fE4AawEbvotXABvDY)


# Introduction

## What's JaxCore *(series)*?

![](/files/fXKkvGlrWsPRXsSgrOAJ)

JaxCore is a collection of utility modules designed to improve your desktop experience and increase your productivity. It also includes a few additional widgets to spice up your desktop.

## Why is JaxCore *(config hub)* needed?

![](/files/Zy1LbpU11qTgzcLWY1V0)

JaxCore (configuration hub) acts as a **settings menu** for all JaxCore modules, while providing continuous support for patch / feature updates. It also allows you to access other modules more quickly!


# Installation

Guide to installing JaxCore

## Prerequisites 🖥️

* **Windows 10 (x64)** or above&#x20;
* For older systems, **Powershell v5.1 or newer** is required. Upgrade Powershell [**here**](https://docs.microsoft.com/en-us/powershell/scripting/windows-powershell/install/installing-windows-powershell?view=powershell-7.2#upgrading-existing-windows-powershell)!

## Installation ✅

#### **Powershell:**&#x20;

Paste & run the following command in Powershell (`win + r` -> `powershell.exe`)

```
iwr -useb "https://raw.githubusercontent.com/Jax-Core/JaxCore/master/CoreInstaller.ps1" | iex
```

{% hint style="success" %}
For installing with other methods, click [here](/getting-started/faqs/jaxcore-faqs#installing-in-another-location)
{% endhint %}

## Installation from external websites :cloud: <a href="#jaxcorerminstaller" id="jaxcorerminstaller"></a>

{% hint style="info" %}
You should be re-directed [here](/getting-started/installation#jaxcorerminstaller) if you're trying to install from DeviantArt / RM Forums.
{% endhint %}

1. Download from the respective posts from the site, run the `.rmskin` installer. It will install a cache skin which installs JaxCore. [(Why?)](/getting-started/installation#why-cant-i-just-get-the-jaxcore-file-then)
2. Proceed through the welcome screen (highly recommended to read everything so you don't get lost).&#x20;
3. You'll be greeted with a screen which asks you want modules or widgets to be installed. Select the one(s) you want.

### Why can't I just get the JaxCore file then?

A cache skin is used to get the latest version, and unifies the installation methods of JaxCore.


# User Interface

Walkthrough of the user interface.

## Home pages

![The navigation bar of the home page](/files/zM5gxnf96H4LRDfsUW9X)

To go to the home page, click the home icon located at the top right hand side of the window.

JaxCore has multiple home pages. Refer to the table below to know more about these pages.

<table><thead><tr><th width="150">Page</th><th width="482.1428571428571">Description</th></tr></thead><tbody><tr><td>Discover</td><td>Discover the best modules and widgets </td></tr><tr><td>Shop</td><td>Explore free / paid addons for modules</td></tr><tr><td>Library</td><td>Explore available modules and widgets, and go to their respective settings </td></tr><tr><td>Settings</td><td>Change JaxCore's settings</td></tr><tr><td>ARROW</td><td>Some other pages in home</td></tr></tbody></table>

## Module settings - Sidebar

<div align="center"><img src="/files/4BvyE8uD62iIDIyQH5O2" alt=""></div>

The sidebar contains all the settings pages for the module or widget.&#x20;

The activation toggle is located at the top and is used to activate or deactivate the module / widget.&#x20;

Every module has a unique set of pages apart from the **Info** page, where you can update and check the version of the module.

## Context menu

![The context menu](/files/uSoYjwcM4jZBCsMz0lET)

Open the context menu by right-clicking anything JaxCore.

|                   | Action                                                   |
| ----------------- | -------------------------------------------------------- |
| Configure in Core | Open the settings menu for interacted module or widget   |
| Align             | Aligns the widget relative to the screen                 |
| Change Z layer    | Puts the widget on different layers of the desktop       |
| Refresh           | Refreshes the interacted component                       |
| Unload            | De-activates the interacted component                    |
| Rainmeter actions | More actions                                             |
| Developer tools   | Allows you to restart Rainmeter / slow-refresh component |

## JaxCore Settings

![](/files/HtNXO2EkOqsI8evu0x8q)


# Additional requisites

## ModularX - ImageMagick <a href="#imagemagick" id="imagemagick"></a>

**1. Download ImageMagick:** [**https://www.imagemagick.org/script/download.php#windows**](https://www.imagemagick.org/script/download.php#windows)

![](https://camo.githubusercontent.com/aac5c97d1a36ac82db815d97d44720c5b398e0cbd53cc11bf81001b4b3ac2787/68747470733a2f2f692e696d6775722e636f6d2f67666a525a78682e706e67)

**2. Install ImageMagick. You must check `Add application directory to your system path`:**

![](https://camo.githubusercontent.com/f972c087f038608b21972465169b1dce48a0532380fd338d4d61b18d4204ede4/68747470733a2f2f692e696d6775722e636f6d2f365462426c546f2e706e67)

**3. Restart Rainmeter by `Right Click (Anything JaxCore) -> Developer options -> Reload Rainmeter`**

## Spicetify for JaxCore

This is only required if you're setting up Spotify using `Auto` media method setting. [FAQs](/getting-started/faqs/media-player-faqs)

**1. Open Powershell, copy the following commands, paste and press enter:**

```
Invoke-WebRequest -UseBasicParsing "https://raw.githubusercontent.com/khanhas/spicetify-cli/master/install.ps1" | Invoke-Expression
spicetify
spicetify config extensions webnowplaying.js
```

:information\_source: **If aren't using Spicetify for theming, run the following command**

```
spicetify config inject_css 0 replace_colors 0
```

**2. And finally, run the following command to save and apply all your changes:**

```
spicetify backup apply
```

**3. Restart Rainmeter by `Right Click (Anything JaxCore) -> Developer options -> Reload Rainmeter`**


# Changing global options

## Global options settings

1. Go to the **settings page** in [home](/getting-started/user-interface#home-pages).
2. Click on *Global settings* in the [sidebar](/getting-started/user-interface#module-settings-sidebar).

### Time format

You can change the time format to **24-hour** or **12-hour**.

### Weather unit

Weather temperature unit: **Imperial (F)** or **Metric (C, default)**

### **Weather location**

Change your weather location here. To find your weather location:

1. Go to [weather.com](https://weather.com)
2. Enter your location in the *search bar* <img src="/files/zBL6V403BRScsU5hBts2" alt="" data-size="line">, and click on the correct result
3. Copy the location similar to the picture below, and paste it in the *weather location* field in JaxCore
4. [Refresh ](/getting-started/user-interface#context-menu)modules or widgets which displays weather information

![Copy format](/files/MKASml9DqcY87lGbI1N5)

{% hint style="info" %}
If the weather does not correctly display, try copying on the first part of the name to JaxCore.
{% endhint %}

{% hint style="info" %}
If it still fails, try [restarting Rainmeter](/getting-started/user-interface#context-menu)
{% endhint %}


# Uninstallation

How to uninstall a module/widget, JaxCore or Rainmeter

{% hint style="info" %}
Experiencing issues? Join the [Core Community discord server](https://discord.gg/JmgehPSDD6) for help.
{% endhint %}

### Uninstalling a Module/Widget

1. Open Core and navigate to the **Library** page, then select a module/widget from the list.
2. Got to the **Info** page and click on **Debug actions**, then click Uninstall
3. Follow through the pop-up that appears and you're done.

### Uninstallation

{% hint style="info" %}
I've put a lot of work into JaxCore, so it's really sad to see you go😓!&#x20;

If you're experiencing problems with JaxCore, you can search for related issues at [FAQs](/getting-started/faqs), or create an issue on the [Github repository](https://github.com/Jax-Core/JaxCore) / help thread on the [Discord server](https://discord.gg/JmgehPSDD6) :hugging:!
{% endhint %}

<details>

<summary>Spoiler</summary>

1. Find **Rainmeter** in Apps & Features (Windows settings) and click uninstall
2. Tick all check-boxes
3. Press uninstall

</details>


# FAQs

## Use the search bar to get to what you're looking for faster!

This is an ever-growing list of commonly asked questions regarding JaxCore. You should be able to find what you're looking for here if you've been redirected here.

{% hint style="info" %}
For module guides, check out the [Modules ](/modules/introduction)or [Widgets ](/widgets/introduction)section.
{% endhint %}


# New user FAQs

## What's JaxCore?

JaxCore is a set of modules and widgets that you can use to customize different aspects of your desktop, like the start menu, volume flyout or desktop clock.

## Does it change my system files?

No. JaxCore doesn't modify any critical files on your system, and only displays windows over the default layer.


# JaxCore FAQs

## Performance

### Does JaxCore load on startup?

It does that by default. However, only modules and widgets are loaded, and the config hub will not load on startup.&#x20;

### Does JaxCore run in the background?

No. The configuration hub will not run in the background. Only activated modules and widgets will.

### Can I turn JaxCore off when I play games?

Yes. You can toggle on Gamemode in the JaxCore settings.

## Legacy issues

### JaxCore hidden / not showing / showing only in taskbar / JaxCore settings won't open

1. Go to the Rainmeter Manage panel (found in your app tray)&#x20;
2. Set `#JaxCore\Main\Home.ini` coordinates to `0 0`. If the option is greyed out, load it.
3. Unload and load it
4. After that, Re-create JaxCore's shortcut in it's setting page so that this issue never happens again

## Installation

Download JaxCore from [our website](https://jax-core.github.io)

### Installing in another location

Select option **3** when the powershell prompt asks for an installation preferences. Then choose a folder once prompted. It is recommended to choose an empty folder as the installer creates 2 folders in the selected directory. If the installer is stuck after clicking **OK**, press enter.

### Already have Rainmeter installed, but portably?

Run the following command in Powershell, replacing `<LOC>` with the absolute path to the folder you want JaxCore installed in, and this folder should contain the Rainmeter folder that you have installed to before.

```
<LOC>
├── Rainmeter       
│   ├── Rainmeter.exe
│   ├── ... other stuff
```

```
$o_Location='<LOC>';iwr -useb "https://raw.githubusercontent.com/Jax-Core/JaxCore/master/CoreInstaller.ps1" | iex
```

## In-app installer

### Unable to install anything within Core / Nothing happens when clicking green download button

#### Goofy-ah anti-viruses

This happens because your anti-virus prevented the Powershell instance to launch. To fix this, exclude the following paths in your anti-virus.&#x20;

```
## Standard installations:
%ProgramFiles%\Rainmeter
%AppData%\Rainmeter
%AppData%\JaxCore

## Rainmeter installations:
%ProgramFiles%\Rainmeter
%AppData%\Rainmeter
Documents\Rainmeter

## Custom location installations:
Exclude the folder that JaxCore is installed in.
```

Save your configuration in your anti-virus and restart.

{% hint style="success" %}
More about false positives [here](/getting-started/faqs/anti-virus-false-positive-faqs)
{% endhint %}

#### Still unable to install anything?

Run the following command to install a specific module. Replace **YourFlyouts** with the name of the module that you want to install.

```
$o_InstallModule='YourFlyouts';$o_FromCore=$true;iwr -useb "https://raw.githubusercontent.com/Jax-Core/JaxCore/master/CoreInstaller.ps1" | iex
```

### After installer finishes, module still isn't installed

Try turning on **Use legacy .rmskin extension installer** in JaxCore settings.&#x20;

{% hint style="info" %}
We're constantly trying to improve the standard installer! If you are willing to help debug this, please create a bug tread on our [Discord server](https://discord.gg/JmgehPSDD6) or [Github repository](https://github.com/Jax-Core/JaxCore)
{% endhint %}

## Reinstallation

Reinstallating would help remove broken folder structures and start fresh

1. Uninstall Rainmeter via Windows Settings
2. Delete `%appdata%\JaxCore` and `%appdata%\Rainmeter`
3. Install from <https://jaxcore.app>

{% hint style="danger" %}
Note: This will remove all modules & widgets.
{% endhint %}


# Miscellaneous FAQs

## Why isn't there a color picker?

The original color picker had been removed due to being flagged as a malicous executable by Windows defender. An alternative will be added soon.

## Are there Multi-Langauge support?

TLDR: No support *yet*

Core supported multi-language before, but I've removed it for now since it is impossible to get accurate translations for each version of core. Support for multiple languages will be added after the upcoming Difia update!

## How do I install a DLC?

Follow through video guide: <https://youtu.be/AGEkN9E7DlY>

## Does JaxCore work on 32-bit systems?

JaxCore currently does not function properly for 32-bit Window installations. Stay tuned for updates on this issue.

## Home page does not load...

There are missing dependencies on your system.&#x20;

{% hint style="info" %}
Please **DO** report this issue to me on our [Support Discord Server](https://discord.gg/JmgehPSDD6)! (Just let me know that this happens)
{% endhint %}

1. Download the [Evergreen Bootstraper Webview2 runtime](https://developer.microsoft.com/en-us/microsoft-edge/webview2/#download-section) and install it. Run with administrator priviledges if it fails to install.
2. Download the Visual C++ Redistributable for your system: [32bit ](https://aka.ms/vs/17/release/vc_redist.x86.exe)| [64bit](< 	https://aka.ms/vs/17/release/vc_redist.x64.exe>)
3. Launch JaxCore again. If it still doesn't load, try restarting your device.


# Anti-virus, false positive FAQs

## Common questions regarding safety

### Bat installation file flagged by browsers and Windows

While downloading the .bat installation file for JaxCore, most, if not all, browsers may flag the .bat file as malicious and prevent you from downloading it. This false positive occurs because JaxCore's website is an “unknown provider” as per the browser and thus, the file is deemed insecure or unsafe.

You may also encounter a similar problem when attempting to run the file after it has been downloaded. Windows Smart Screen prevents you from running the file and attempts to warn you that it may be unsafe. The reason is the same as before: The file was obtained from an unknown source.

However, you can rest assured that the .bat file is completely safe.&#x20;

### JaxCore being flagged by VirusTotal

The installation package may trigger a false positive alert in your antivirus program. This is due to the `.exe` files stored in the package, which is required to automate parts of the program. The program being flagged is usually done through heuristic analysis, not via a database of known viruses. That means that the antivirus program thinks that due to the nature of the code in this application, it likely may be a virus, a program that the user does not really mean to run.&#x20;

Also, the source code is always available [here](https://github.com/Jax-Core/JaxCore), so you have all the tools necessary to make an informed decision.

### Installed JaxCore's files being flagged by anti-virus

Some antivirus software may occasionally flag JaxCore's files as malware, resulting in those files being quarantined the majority of the time. But, like the previous false positives, this one is also a false positive. What actually happens is that the antivirus flags the powershell processes that JaxCore requires to function properly, resulting in false positives. However, regardless of the warning or the cause of the false positive, all of JaxCore's files and JaxCore are completely safe.&#x20;

## Common issues caused by anti-viruses

### Unable to install anything within Core

Read [this](/getting-started/faqs/jaxcore-faqs#unable-to-install-anything-within-core)


# Modules FAQs

## General

### Why does the module not show up?

Refer to [introduction](/modules/introduction)

### Why doesn't the module work?

Make sure the module is activated first. Check the toggle button located at the top of the [sidebar ](/getting-started/user-interface#module-settings-sidebar)in the [module's settings](/getting-started/user-interface#home-pages).

### How can I change the position of modules?

Head to the *Position* settings via the [sidebar](/getting-started/user-interface#module-settings-sidebar), and change the options here

![What you might see in the position settings](/files/1Gusym0ZdGRhHhB8IV1m)

* **Padding** refers to the space that exists between the module and the screen border in pixels.
* **Monitor index** refers to which monitor the module is located at
* Use the **direction boxes** to change where the module is aligned to, relative to the screen

### Can I make clones of modules?

Unfortunately not. Part of the module is hard-coded to itself, so clones of modules will not function.

### How do I set the hotkey to XXX?

Click on the option which changes the hoktey, most often in the general settings. It will show a popup which looks like the following:

![JaxCore Hotkey configurator](/files/8LLUDtVaEvmDiIrIECfb)

Navgiate this popup from top to bottom.

1. Focus on the hotkey field (The **None** box)
2. Press the hotkey that you want. If it contains a key listed below the box, click any other key first. *(For example, if you want `alt+space`, press`alt+s` first)*
3. If your desired hotkey contains a key listed in the second section, check the radio button, else simply skip this section. *(Continuing example, click on the button for `Space`)*
4. If you also want the Windows key to be part of the hotkey, check the last box
5. Click confirm

### **How to go through the setup wizard again?**&#x20;

1. Clear setup wizard data from the info page with the debug actions&#x20;
2. Click on patch notes&#x20;
3. Click on new to module

## Visual

### Blur corner is not rounded

This feature is only supported for Windows 11 or above.

## Debugging

### How do I reinstall a module?

1. Click on **debug options** on the info page of settings
2. Click on **uninstall**
3. Select the last option, the module will be removed after that
4. Install the module again by pressing the download button


# YourFlyouts

## Activation

### Default volume shows up instead of YourFlyouts

* Make sure you've activated the module
* If changing the volume still shows the default volume flyout, turn on options under `JaxCore -> YourFlyouts -> General -> Category: Compatability`


# YourMixer

## Activation

### YourMixer flickering when clicking on icon on taskbar

1. Try [reinstalling ](/getting-started/faqs/modules-faqs#how-do-i-reinstall-a-module)YourMixer
2. If issue presists, increase animation steps (try doubling) `JaxCore -> YourMixer -> General -> Setting: Animation steps`


# ValliStart

## Features

### Why does ValliStart open the default search menu?

Unfortunately ValliStart does **not** have a built-in search menu yet. This will hopefully be added after JaxCore's Difia update, where things will be faster and easier to manage.

### Why *doesn't* ValliStart open the search menu?

By default, ValliStart opens the search menu by **Win + S**. Make sure this hotkey functions properly in your system. If not, change it to something that opens your search / launcher.&#x20;

{% hint style="info" %}
If you are confused as how to use the hotkey configurator, click [here](/getting-started/faqs/modules-faqs#how-do-i-set-the-hotkey-to-xxx)
{% endhint %}

### Can I make ValliStart open PWT search / other launchers?

Yes. Change `ValliStart -> General -> Setting: Key to run after key input is captured` to the hotkey which you launch your launcher.

## Activation

### ValliStart doesn't show up when clicking on the start button.

Refer [here](/modules/vallistart#replacing-the-native-windows-button-and-key).

## Visual

### ValliStart's too big for my monitor

Change the scale option.


# IdleStyle

### How can I correctly position IdleStyle on multiple monitors?

**Change the position settings.**

Go to the position settings, and change the following options:

1. **Screen to display on**\
   The index of the screen to display the main section of IdleStyle. *(e.g. second monitor: 2)*
2. **Number of screens to stretch horzontally**\
   The number of screens that you want IdleStyle to cover. If you only want it to cover your primary monitor, set this value to 0.
3. **Alignment of screensaver**\
   Direction of the screens from the main sections' position

If you are unable to achieve the results you want, turn off **Smart detection** and change the following options:

1. **Screen to display on**\
   The index of the screen to display the main section of IdleStyle. *(e.g. second monitor: 2)*
2. Click on **Open Editor** and position the overlay over all of your monitors, then press **Enter**.

### Why isn't the Idle timer ticking?

Windows might be constantly checking for driver updates, and hence resetting the timer. You can try making sure all your drivers are up to date.

### Can I show the same contents on multiple monitors?

Unfortunately not.


# Keylaunch

## Custom actions (Advanced usage)

The format for an action is

```
["PATH TO SOMETHING"]
["URL TO WEBSITE"]
[WINDOWS COMMAND TO RUN]
```

You can run multiple actions at once

```
["PATH TO 1st FILE"]["PATH TO 2nd FILE"]["PATH TO 3rd FILE"]
```

## Edits not applying / unable to create new action

Known issue. If this happens, click on the actions page and try again.


# Keystrokes OSD

## How do I move the OSD?

Use the drag hotkey `Win + O`, which is set with the setting `Toggle draggability` to enable dragging for the OSD. After moving it to the new location, use the hotkey again to make it un-draggable.


# Widget FAQs

## General operation questions

### How do I clone a widget?

You can clone widgets within JaxCore. Note that cloned widgets will not receive style updates / bug fixes.

1. Go to the info setting for the widget you want to copy
2. Click on *make clone* in actions
3. Enter the clone's name, make sure it does not have any spaces in it
4. JaxCore would close after that. Restart it and go to the **library page** in [home](/getting-started/user-interface#home-pages).
5. Click on *Go to settings of widget or module...*
6. Enter the cloned widget name
7. Activate the newly created clone from the [sidebar](/getting-started/user-interface#module-settings-sidebar).

### How do I lock a widget in place?

<figure><img src="/files/or3uY37RVoimCT9ruHSk" alt=""><figcaption><p>Use the context menu to toggle draggability</p></figcaption></figure>

### What should I do if I've made it click through but I want to drag it?

Hold **Ctrl** and then **Right click**

<figure><img src="/files/9REAeHWZT58oAwflIXS5" alt=""><figcaption></figcaption></figure>

### How do I align a widget?

Right click -> Align

## Known issues

### ModularClocks or ModularPlayers flickering when using 16 or blur style

This issue is caused by Windows providing the wrong wallpaper path, causing the blur to refresh everytime the clock refreshes.

To fix this issue, change your wallpaper to something else, rename the original wallpaper with simple charcters / relocate to desktop and refresh the widget.


# ModularClocks

### Unable to locate the clock when activated

Click on **Reset location** in the information page for ModularClocks

<figure><img src="/files/NtoGaDiY7h6v0grVixaK" alt=""><figcaption></figcaption></figure>


# ModularVisualizer

### What should I do if it completely fails to work?

* Volume Mixer - Check if Rainmeter has been muted or turned low in the volume mixer, simply search volume mixer to go there
* Audio Device - Check if your settings correspond to the right audio device
* If after verifying both the visualizer is still static, try updating your [.NET runtime](https://www.microsoft.com/en-us/download/details.aspx?id=54616) (first file).

*If unfortunately the issue persists, the visualizer might not be compatible with your device.*

### High resource usage

* Make sure you have hardware acceleration turned on in JaxCore settings
* Try reducing bar count
* Try not using image underlay


# Plainext

### CPU / GPU sections are blank

Run the following commands in command line as Administrator

```
cd c:\windows\system32
lodctr /R
cd c:\windows\sysWOW64
lodctr /R
```


# Media Player FAQs

## General

### **Why does player progress update slowly / does not return progress?**

* The issue is caused by the media player (Spotify / browser) itself, and is not a problem with the module.&#x20;
* This mostly happens with `modern` method as Windows often doesn't request the current position
* &#x20;You can fix this by using `Auto` method for your modules instead (See below)

## Setting up media players

### Default settings

There is no setup needed by default. Everything should work out of the box

### Auto method

Users can choose to use `Auto` method to fully support certain media players.&#x20;

* **Spotify**: Requires [Spicetify](/getting-started/additional-requisites#spicetify-for-jaxcore)
* **Web browsers (Youtube / Soundcloud etc.)**: Requires [WebNowPlaying ](https://www.google.com/search?q=webnowplaying+companion)companion
* **MusicBee**: Turn on [this ](https://media.discordapp.net/attachments/148718731743199233/354326491280048130/unknown.png)option in MusicBee settings
* **Foobar**: Install the [foo\_cad](https://poiru.github.io/foo-cad/) plugin for foobar

## Spotify with Modern method

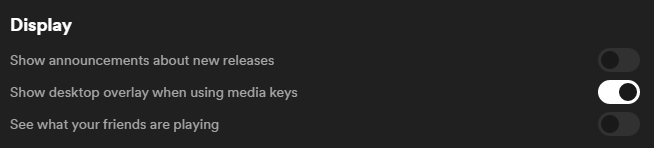
Make sure this option is turned on in Spotify's settings. (Default is on)

<figure><img src="/files/t8IdDRKxSLwxchIzx0mx" alt=""><figcaption><p>Spotify settings</p></figcaption></figure>


# Performance FAQs

## Crash issues

### How do I launch JaxCore after it crashing?

1. Launch Rainmeter using search
2. Launch JaxCore

### JaxCore crashes on startup

[Reinstall](/getting-started/faqs/jaxcore-faqs#reinstallation)

### JaxCore crashes randomly?

1. Launch Rainmeter if it already crashed
2. Open JaxCore
3. Go to your modules, and set **Media method** (Music settings) to **Auto** for all
4. Setup your media players for the Auto method following [this guide](/getting-started/faqs/media-player-faqs#auto-method)

If issue persist, [Reinstall](/getting-started/faqs/jaxcore-faqs#reinstallation)

### JaxCore crashes constantly when editing settings

*Unfortunately, there are no direct, magical solutions to this issue, but you can try the following solutions:*

* Make sure JaxCore is up to date, check in core settings
* Turn on hardware acceleration in core settings
* Make sure you met the [requirements](/getting-started/installation#prerequisites)&#x20;
* [Reinstall](/getting-started/faqs/jaxcore-faqs#reinstallation)

## Performance issues

### Modules / JaxCore freezing & making mouse jittery and unresponsive

This issue mainly happens when a part of MetroUI (e.g. Default start menu / taskbar calendar) is active, preventing JaxCore from taking focus from these UI features. It might also happen when simply trying to load core using a desktop icon.

To fix this issue, load JaxCore using **Right click --> Configure in core --> Home** instead of using the Taskbar icon, and simply try to avoid launching core modules when a part of metro UI is active. When that happens, simply click on the desktop.


# Introduction

## What are modules? Why do I need them?

Modules replaces certain parts of the system's UI. For example, YourFlyouts replaces the default windows flyouts and ValliStart replaces the start menu. They are different to widgets, as they are not part of the desktop and will not stay there.&#x20;

All JaxCore modules will allow you to change the bit of the UI to your liking, providing you plenty of customization for appearance and functionality.


# YourFlyouts

Windows Audio / Volume flyouts replacement

![](https://user-images.githubusercontent.com/80020581/173569289-ef77a148-f115-4796-ba0e-dcb258b1403a.png)

**YourFlyouts** provides multiple replacements for the old, built-in, Metro Design based Audio/Media/Brightness flyouts in Windows which are shown while pressing the media or volume keys. Along with a number of unique designs, it also provides additional customizability towards the behavioral **and** appearance side of things!

More: [Github repo](https://github.com/Jax-Core/YourFlyouts)

### Media player

This module will retrieve and display media metadata. You can learn how to set it up [here](/getting-started/additional-requisites).

### Positioning

This module automatically positions itself. You can learn how to change the positioning [here](/getting-started/faqs).

### Windows 11 22H2 support

A recent update to Windows 11 changed how volume flyout works, and so the original flyout callback doesn't function properly anymore in the updated version of Windows.

* To make YourFlyouts work under this version, turn on options under `JaxCore -> YourFlyouts -> General -> Category: Compatability`
* Brightness and airplane mode flyouts might not work properly on this Windows version
* We'll look into fully fixing this issue in the future


# YourMixer

A custom volume mixer to replace the default one.

![](/files/YEHNdGk6V7xj4JqU4CX8)

**YourMixer** replaces the standard Windows Volume Mixer with a fully customizable volume controller.

More: [Github repo](https://github.com/Jax-Core/YourMixer)

### Positioning

This module automatically positions itself. You can learn how to change the positioning [here](/getting-started/faqs).

### Multiple volume bars for an app?

This is an intended feature. Some apps would have different output channels, for example Discord would have one for notification sounds and one for voice chat sounds.


# IdleStyle

Stylized screensavers

![](/files/9qiGZTbeivJhECVOxQBp)

**IdleStyle** offers fully customizable screensavers with custom animation support. Custom animations can be used to display a range of things such as images and videos.

More: [Github repo](https://github.com/Jax-Core/IdleStyle)

## Customization

### Animation styles

Choose your preferred animation style in the animations tab.

### Video Backgrounds

**Configuring ffplay:**

To use video backgrounds, you must first install and configure **ffplay** which is a part of [**ffmpeg**](https://github.com/BtbN/FFmpeg-Builds/releases)**.** Follow the instructions below to setup **ffplay**.

1. Open [this link](https://github.com/BtbN/FFmpeg-Builds/releases/download/latest/ffmpeg-master-latest-win64-gpl.zip). This link will download a zipped file named `ffmpeg-master-latest-win64-gpl.zip`
2. Extract the zipped file you just downloaded and open the `ffmpeg-master-latest-win64-gpl` folder. Inside, you will find another folder with the same name which will be required in the next step.
3. Open the `ffmpeg-master-latest-win64-gpl` folder, and go into the `bin` folder.
4. Copy the `ffplay.exe` (`CTRL + C`).
5. Open File Explorer and navigate to `%appdata%\Rainmeter\JaxCore\CoreData\IdleStyle`.\
   *<mark style="color:orange;">For existing Rainmeter users:</mark>* <mark style="color:orange;"></mark><mark style="color:orange;">`%USERPROFILE%\Documents\Rainmeter\Skins\CoreData\IdleStyle`</mark>
6. Paste the `ffplay.exe` you copied in **Step 4** into the folder named `IdleStyle` which you opened, on **Step 5**

**Setting up the video background:**

1. Open Core and head over to the **Modules** section.
2. Select **IdleStyle** from the list and proceed to the **Animation** tab.
3. Second from the bottom, enable the custom video background preset.
4. Go to **Appearance** tab and under **Customization** press the `DefaultVideo` button besides the `Video Path` text.
5. Choose the custom video background you want to use. **Please select common file formats such as `.mp4`**


# ValliStart

A start menu to replace the un-customizable one that you have right now.

![](https://user-images.githubusercontent.com/80020581/169686772-4ffa8032-c98f-4af7-9805-4f6bcfd25d32.png)

**ValliStart** is a start menu replacement for Windows, with full customizability, interchangeable modules and more.

More: [Github repo](https://github.com/Jax-Core/ValliStart)

### Media player

This module will retrieve and display media metadata. You can learn how to set it up [here](/getting-started/additional-requisites).

### Positioning

This module automatically positions itself. You can learn how to change the positioning [here](/getting-started/faqs).

### Weather info

This module can display weather information. You can learn how to set it up [here](/getting-started/changing-global-options).

## Activation

ValliStart can be activated in multiple ways:

### **Replacing the native windows button and key**

You can launch ValliStart just like the start menu with the `Win` Key. Additionally, you can replace the windows button by:

#### Creating a pseudo start button with core

1. Navigate to `JaxCore -> ValliStart -> General -> Setting: Customize how to activate ValliStart` and turn on override start button.
2. Select a start orb name. The default is `Win11`. You can choose another one / add your own one in the orbs directory, and entering another start orb name.
3. Press the `Create` button above
4. Core should popup the explorer with shortcut `ValliStart.lnk` inside
5. Drag the shortcut to the taskbar
6. Now you have a pseudo start button on the taskbar!
7. If you want to remove the stock start button: You can use [StartKiller](http://www.startkiller.com/) for Win10. There are no known ways of doing so on Windows 11.

#### Using ValliStart's WinBlock function to create an overlay which overlaps the start button on your taskbar

1. Navigate to `JaxCore -> ValliStart -> General -> Setting: Customize how to activate ValliStart` and turn on override start button.
2. Toggle `Setting: Display WinBlock element (legacy)` on
3. Switch `Setting: Win block behavior` to edit
4. Drag the winblocker to desired location
5. Switch `Setting: Win block behavior` to functional

### **Using a separate hotkey**

You can also launch ValliStart with the hotkey of your choice. This does not support overriding the displayed window button on your taskbar.

1. Navigate to `JaxCore -> ValliStart -> General -> Setting: How should ValliStart behave?` and switch the option to `Separate module`
2. Change `Setting: Activation Hotkey`to your desired hotkey

## Customization

### ValliStart modules

![An empty module](/files/vkALElMkJpzkaKwzG5zb)

You can fully customize ValliStart's modules in ValliStart's `module` settings.&#x20;

**Arrow icon / clicking on the image** would allow you to select a module from 4 categories.

**Cross icon** would empty the module slot

**Cog icon** would show the settings for that module slot

### ValliStart layouts

Layouts are pre-made set of ValliStart modules which you can apply instantly.

### ValliStart shortcuts

![The shortcut module](/files/Fs1X7RWRPkTWFAAnfl8O)

![What the shortcut modules looks like by default](/files/v4Vn8fiQpbniCexRmy8M)

![Different shortcut styles](/files/qmuLwXiQEjoPKt7WLQVb)

After applying the shortcuts module, click on the top right icon in ValliStart to change or add new shortcuts.

You can customize the appearance of the shortcuts by clicking on the **cog icon** in the shortcuts editor, and choosing 1 of the 3 styles. The default is `Win11`.


# Introduction

## What are widgets?

Widgets are part of your desktop and stays there. They shows different useful information. For example, mPlayers show NowPlaying information and mClocks shows the current time and weather.

All JaxCore widgets have loads of options and styles for you to change it to your liking.

## Cloning widgets

FAQs


# ModularClocks

A clock, sometimes with weather info.

### ImageMagick

Required to generate bur and other fancy effects. You can learn how to get it [here](/getting-started/additional-requisites).

### Weather info

This module can display weather information. You can learn how to set it up [here](/getting-started/changing-global-options).


# ModularPlayers

Media metadata displayer.

### ImageMagick

Required to generate bur and other fancy effects. You can learn how to get it [here](/getting-started/additional-requisites).

### Media player

This module will retrieve and display media metadata. You can learn how to set it up [here](/getting-started/additional-requisites).


# ModularVisualizer

A visualizer.

## L**ayouts**

ModularVisualizer comes with eight custom layouts that you can further customize to your liking. **Please keep in mind that each layout has a plethora of customization options that are beyond the scope of this guide, so explore them for yourself.**

## **Customization**

Further in-depth customization can be done through the **Appearance**, **Render**, **3D overlay**, and **Audio** tabs. You won't be constrained by the skin's customization capabilities!


# Overlayer

Simple layering effect tool

### Creating layering effect for your wallpaper

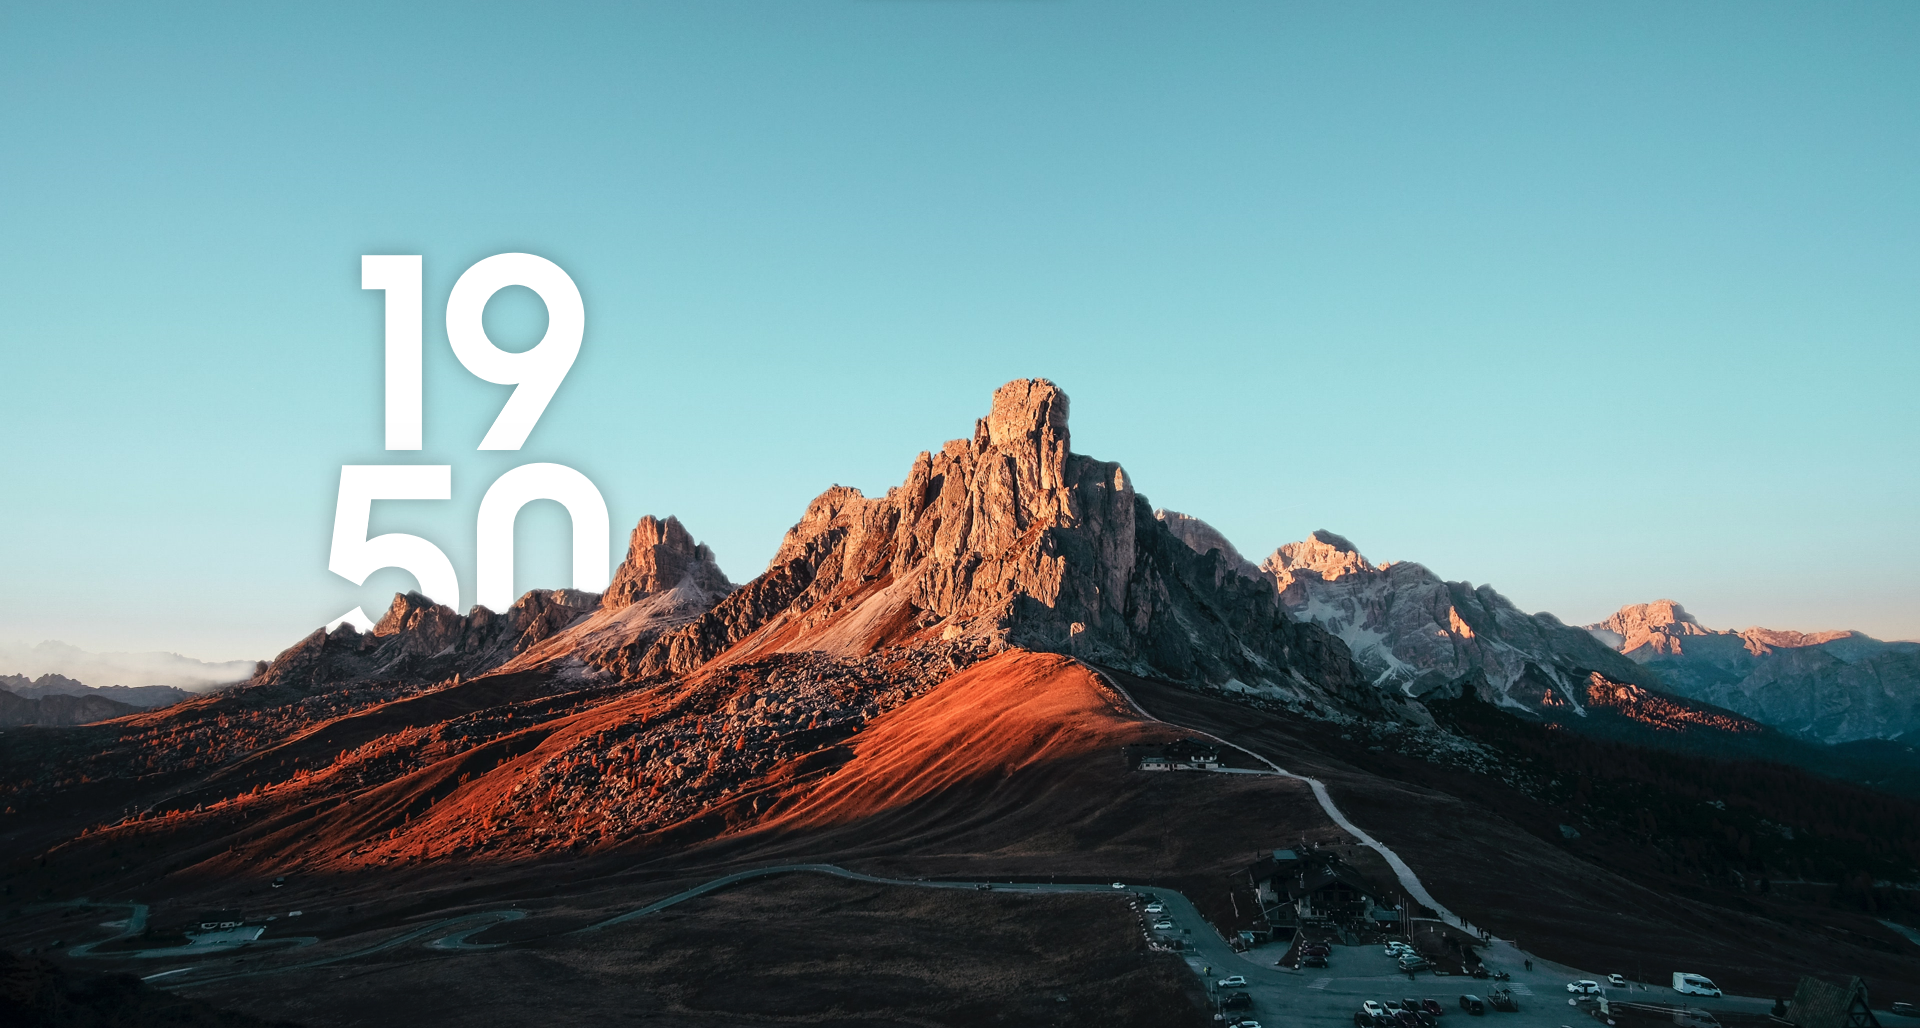
Let's create a simple effect with this wallpaper and ModularClocks!

{% file src="/files/xyaUJVD9X006gyx4kkpp" %}
Image from Unsplash
{% endfile %}

1. Create a cut-out of your wallpaper's main object (i.e. a mountain) using a photo-editing tool or a website like [https://retoucher.online](https://retoucher.online/upload)
2. Select the image in Overlayer's general settings, and activate Overlayer
3. Position ModularClocks to your desired location, right click on them and select **Change Z Layer...** and choose either **-1** or **-2**
4. There we go!

<figure><img src="/files/EQS1T7A5tycD2sH57wwc" alt=""><figcaption><p>There we go!</p></figcaption></figure>


# Plainext

Very cool CLI-like desktop widget

## **Layouts**

Plainext includes two alignment options as well as some customization options for each alignment.

## **Customization**

Further in-depth customization can be done through the **Appearance**, **Modules**, and **General** tabs.


# FAQ


# Code formatting

It is highly recommended to have a consistent code format across all your modules.

## Code sections&#x20;

It is highly recommended to have 4 different sections for every `.inc` or `.ini` file:

```
; THIS IS THE HEADER SECTION, THOUGH NORMALLY I DON'T RULE THIS SECTION OUT

[Rainmeter]
Update=-1

; This is the place to include variables

; ---------------------------------------------------------------------------- ;
;                                   Function                                   ;
; ---------------------------------------------------------------------------- ;

; This is where you should put & include all the measures

; ---------------------------------------------------------------------------- ;
;                                  MeterStyles                                 ;
; ---------------------------------------------------------------------------- ;

; This is where you should put & include all the meter styles

; ---------------------------------------------------------------------------- ;
;                                    Content                                   ;
; ---------------------------------------------------------------------------- ;

; This is wherre you should put & include all the meters
```

## Naming

Of course, you can name however you want, but here are some styles that I recommend

### Variables

`#element_Name#` where `Name` is a value for `element` (e.g. `#Pri_Color#`)

`#n#` where `n` is a short form or first letter of the variable name `name` (e.g. `#R#`)

### Meters

`[Element.MeterType]` where `Element` is what meters make of, and `MeterType` is the type of the meters.

`[GroupIndex]` where `Group` is what the meter is part of (for example, a list) and `Index`is an integer appended to the meter. Useful for multiple elements of a list

### MeterStyles

`[Element.MeterType:S]` for a style for `MeterType` of `Element`

`[Level.Element:S]` for a style which is above the main module file (e.g. Core) and is applied to a single meter to make `Element`.&#x20;

`[ElementStyle]` for a quick low-level meter style for `Element`

### Measures

`[mFunction]` for a measure with `Function` (e.g. `toggle` for a toggle function, `CPUPer` for returning the percentage of CPU usage)

`[ACTIONACTIONNAME]` for a [Measures](/coding-a-module/measures#nuol-measure)which executes `ACTIONNAME`. The prefix `ACTION` is literal.


# Variables

### General variables

You should always append these customizable variables to `./@Resources/Vars.inc`

```
[Variables]
Scale=
FontFace=
Pri_Color=
Text_Color=
Accent_Color=
```

You should always append these variables to the main skin file

```
[Variables]
W=([num]*#Scale#)        ; Width
H=([num]*#Scale#)        ; Height
P=([num]*#Scale#)        ; Padding
R=([num]*#Scale#)        ; Rounding
```

### Custom skin dimensions

If you plan to allow users to set the skin's dimensions, you can:

```
[./@Resources/Vars.inc]
user.W=[num]
user.H=[num]
user.P=[num]
user.R=[num]


[Main.ini]
W=(user.W*#Scale#)
H=(user.H*#Scale#)
P=(user.P*#Scale#)
R=(user.R*#Scale#)
```


# Dynamic & Reactive user interface

Creating a module with a reactive user interface can be achieved in Rainmeter with inline formulas and mouse action bangs.

In most cases, you do not want to use fixed dimensional values for **anything**. This includes `X Y W H R StrokeWidth FontSize`. The only case that you will have fixed values for anything is if your module is **generated** from a lua / ps1 script.&#x20;

## Scaling

To make a module which can scale according to `W H` and `Scale` you'll need to have position & dimensional options for meters set with **inline formulas**.

The simplest form of an inline formula is `X=(150*#Scale#)`This tells Rainmeter to scale your X value according to the `Scale` variable.

{% hint style="info" %}
Every inline formula must be contained in a bracket
{% endhint %}

```
; An example of a completely scaled shape meter
[Shape]
Meter=Shape
Shape=Rectangle 0,0,150,150,4 | StrokeWidth (2*#Scale#) | Scale #Scale#,#Scale#,0,0
; or alternatively, you can scale the shape like this
Shape2=Rectangle 0,0,(150*#Scale#),(150*#Scale#),(4*#Scale#) | StrokeWidth (2*#Scale#)

```

To scale any meter is as simple as multiplying their positional and dimensional values.

## Aligning

Most Rainmeter element (except for a few) is aligned from it's top left corner. Therefore, you can't just set a meter's X value to `(#W#/2)` and expect it to center

### Center

General formula: `=(#Total#/2-#Group#/2)`&#x20;

Total is the sum of dimensional units to align the Group center\
Group is the sum of dimensional units to be aligned center

```
; Example of centering a image meter to shape with WH
[Variables]
Scale=1
W=(200*#Scale#)
H=(200*#Scale#)
[Shape]
Meter=Shape
W=#W#
H=#H#
SolidColor=255,0,0
[Image]
Meter=Image
DynamicVariables=1
W=(100*#Scale#)
H=[Image:H]
X=([Shape:W]/2-[Image:W]/2)
Y=([Shape:H]/2-[Image:H]/2)
```

However, for `string` and `shape` meters, you can use alternative ways to center them

```
; Aligning a string according to their submeternames:
[String]
Meter=String
MeterStyle=Center#Align#

[String:CenterWH]
X=(#W#/2)
Y=(#H#/2)
StringAlign=CenterCenter

[String:CenterH]
X=(10*#Scale#)
Y=(#H#/2)
StringAlign=LeftCenter

[String:CenterW]
X=(#W#/2)
Y=(10*#Scale#)
StringAlign=CenterTop        ; "Center" defaults to "CenterTop"
```

```
; Aligning a shape meter to WH
[Shape]
Meter=Shape
X=(#W#/2)
Y=(#H#/2)
Shape=Rectangle 0,0,(10*#Scale#),(10*#Scale#) | OffSet (-5*#Scale#),(-5*#Scale#)
```

### Side

Aligning left general formula: `=(#AnchorDim#+#OffSet#)`\
Aligning right general formula: `=(#AnchorDim#-#OffSet#-#Group#)`

AnchorDim is the dimensional positional value where the meter is aligned at\
OffSet is the distance between the alignment anchor and the meter\
Group is the sum of dimensional units to be aligned right

{% hint style="info" %}
Using `R` or `r` you can sometimes omit using `#AnchorDim#`. More on the Rainmeter wiki:&#x20;

<https://docs.rainmeter.net/manual/meters/general-options/#XY>
{% endhint %}

```
; A few ways to align a meter after a meter (left)
[PrevMeter]
...
[Meter]
X=(20*#scale#)R
X=(20*#scale#+[PrevMeter:XW])

; Aligning a meter before a meter (right)
[RightMeter]
X=([Meter:X]-[RightMeter:W]-20*#Scale#)
```

And again, there are other ways to center `String` and `Shape` Meters. No examples will be given, as you can probably figure it out :stuck\_out\_tongue:

## Synergizing scale & align

You can use both scaling and aligning to create complex scaleable elements.\
Example: [MeterStyles](/coding-a-module/meterstyles#creating-a-meter-style)

## MouseActions

A generic mouse over mouse leave action looks like this

```
[Meter]
...
MouseOverAction=[!SetOption #CURRENTSECTION# OptionName OverValue][!UpdateMeter #CURRENTSECTION#][!Redraw]
MouseLeaveAction=[!SetOption #CURRENTSECTION# OptionName LeaveValue][!UpdateMeter #CURRENTSECTION#][!Redraw]
```

However, you can't configure a shape's inline options with `!SetOption`. This is what you should do alternatively.

```
[Shape]
...
Shape... | Extend Fill
Fill=Fill Color #LeaveColor#
MouseOverAction=[!SetOption #CURRENTSECTION# Fill "Fill Color #OverColor#"][!UpdateMeter #CURRENTSECTION#][!Redraw]
MouseLeaveAction=[!SetOption #CURRENTSECTION# Fill "Fill Color #LeaveColor#"][!UpdateMeter #CURRENTSECTION#][!Redraw]
```


# Measures

## NUOL measure

A NUOL measure is a disabled measure which when updated executes a bang.&#x20;

```
[Rainmeter]
OnRefreshAction=[!Delay 20][!EnableMeasureGroup NUOL]
; having a delay prevents the measures from updating & executing when the module is first loaded

[ACTIONHELLOWORLD]
Measure=Calc        ; Any unreactive measure type is fine
OnUpdateAction=[!Log "HelloWorld!"]     ; can be any action
Group=NUOL
Disabled=1
```

And to call this bang, you can simply update the measure with \
`!UpdateMeasure ACTIONHELLOWORLD`&#x20;

But why not just call a variable with a bang value? That will work... but only when called in the currentconfig. Using a NUOL measure you can call the bangs from a different config with\
`!UpdateMeasure ACTIONHELLOWORLD "MainConfigName\Main"`

## mToggle measure

{% hint style="warning" %}
mToggle measures are used in most hotkey modules toggle\
It is not recommended to use mToggle anymore, instead, use lua to achieve better results
{% endhint %}

A mToggle measure is a measure which when called toggles and execute actions.\
We'll be using NUOL measures to support calling functions from different configs.

```
[mToggle]
Measure=Calc
Formula=1 - mToggle            ; every time the measure updates, the value toggles
IfCondition=mToggle = 0
IfTrueAction=[!UpdateMeasure ACTIONLOAD]
IfFalseAction=[!UpdateMeasure ACTIONUNLOAD]
```

{% hint style="info" %}
The default value of mToggle is always 1, and you cannot have it default 0.&#x20;
{% endhint %}

This mToggle works, but you are unable to set it to either value with an action. Therefore, we'll be needing another measure to set mToggle's value: **mToggleSet**

```
[mToggleSet]
Measure=Calc
Formula=mToggle
IfCondition=mToggle = 0                ; This allows the measure to always set mToggle's value to 1
iftrueaction=[!UpdateMeasure mToggle]
ifconditionmode=1
Group=NUOL
Disabled=1
```


# MeterStyles

MeterStyle are base settings that can be applied to meters, to avoid repetitive settings

## String:Style

Should be applied to all string meters

```
[String:S]
AntiAlias=1
FontSize=(12*#Scale#)
FontFace=#Font#
FontWeight=400
FontColor=#Text_Color#
SolidColor=0,0,0,1            ; to allow better click detection
```

## Creating a MeterStyle

Sometimes, you may come across situations where you'll need multiple meters with same relative positional values but a few different options

You can make use of `#CURRENTSECTION#` to reduce the amount of code needed to edit for each meter section.

The most common type of situation is when you need to have multiple buttons next to each other.

```
[Button.Shape:S]
X=((150/2+20)*#Scale#)r
Y=(-40/2*#Scale#)r
Shape=Rectangle 0,0,150,40,5 | StrokeWidth 0 | Scale #Scale#,#Scale#,0,0 | Extend Fill
Fill=Fill Color #Sec_Color#
MouseOverAction=[!SetOption #CURRENTSECTION# Fill "Fill Color #Ter_Color#"][!UpdateMeter #CURRENTSECTION#][!Redraw]
MouseLeaveAction=[!SetOption #CURRENTSECTION# Fill "Fill Color #Sec_Color#"][!UpdateMeter #CURRENTSECTION#][!Redraw]
; We used #CURRENTSECTION# here so we don't have to enter the section names each time
[Button.String:S]
FontSize=(15*#Scale#)
StringAlign=CenterCenter
X=(150/2*#Scale#)r
Y=(40/2*#Scale#)r

[Button.Shape.1]
Meter=Shape
X=0                        ; append the initial positional values for the first button
Y=0
MeterStyle=Button.Shape:S
[Button.String.1]
Meter=String
MeterStyle=String:S | Button.String:S        ; apply both meter styles
[Button.Shape.2]
Meter=Shape
MeterStyle=Button.Shape:S
[Button.String.2]
Meter=String
MeterStyle=String:S | Button.String:S
```

{% hint style="info" %}
Keep in mind that key values in the meter section **always** override any MeterStyles.&#x20;
{% endhint %}

More info of part of this code:\
[Dynamic & Reactive user interface](/coding-a-module/dynamic-and-reactive-user-interface#scaling) [Dynamic & Reactive user interface](/coding-a-module/dynamic-and-reactive-user-interface#center) [Dynamic & Reactive user interface](/coding-a-module/dynamic-and-reactive-user-interface#mouseactions) [Code formatting](/coding-a-module/code-formatting#meter-and-measure-naming)


# AutoHotkey usage

Using .ahk files in a module

{% hint style="info" %}
Replace all `#SKINNAME#` instances you see on this page with your module name
{% endhint %}

The following guide will show you how you can use AHK to run 2 toggling bangs by pressing a hotkey for your module. \
Of course, this isn't what AHK is limited to do, as demonstrated by the YourFlyouts module.

## Getting started

Create file `./@Resources/Actions/Source code/#SKINNAME#.ahk`

```
#SingleInstance Force
#NoTrayIcon
SetTitleMatchMode, 2
DetectHiddenWindows, On

IniRead, OutputVar, Hotkeys.ini, Variables, Key
IniRead, RainmeterPath, Hotkeys.ini, Variables, RMPATH

Hotkey,%OutputVar%,Button
Return

Button:
Run "%RainmeterPath% "!UpdateMeasure "mToggle" "#SKINNAME#\Main" "
Return
```

And create file `./@Resources/Actions/Source code/Close.ahk`

```
#NoTrayIcon

IniRead, OutputVar, CloseInstance.ini, Variables, Module

CloseScript(Name)
	{
	DetectHiddenWindows On
	SetTitleMatchMode RegEx
	IfWinExist, i)%Name%.* ahk_class AutoHotkey
		{
		WinClose
		WinWaitClose, i)%Name%.* ahk_class AutoHotkey, , 2
		If ErrorLevel
			return "Unable to close " . Name
		else
			return "Closed " . Name
		}
	else
		return Name . " not found"
	}

CloseScript("#SKINNAME#.ahk")
ExitApp
```

And finally, create file `./@Resources/Actions/Hotkeys.ini`

```
[Variables]
Key=
RMPATH=
KeyInString=
```

:tada:Congratulations! All necessary files have been created. Lets move on to the code part...

## Assigning default values

As you can see, in `Hotkeys.ini` the values are blank. We'll have to assign a default value first.&#x20;

1. You can either put these values in the file, to make the default hotkey `LWin W`

   ```
   Key=#W
   KeyInString=LWin W
   ```

   Or you can visit your settings page (if you made one) and change the hotkey.
2. Open the `@Start` skin from the Rainmeter manage panel.

## Integration to your module

As you've read about the[Measures](/coding-a-module/measures#mtoggle-measure), lets use that to toggle our module.

{% hint style="info" %}
This method works, but can be more efficient by the use of a lua script.
{% endhint %}

1. Paste the 2 blocks into your main skin file.
2. Add the following contents to the `[Rainmeter]` section:

   ```
   [Rainmeter]
   DefaultAlwaysOnTop=1
   OnRefreshAction=...["#@#Actions\AHKv1.exe" "#@#Actions\Source Code\#SKINNAME#.ahk"]
   OnUnfocusAction=[!UpdateMeasure mToggleSet]
   OncloseAction=["#@#Actions\AHKv1.exe" "#@#Actions\Source Code\Close.ahk"]
   ```

   This allows the module to:

   1. Always stay on top of other windows
   2. Launch the ahk process when the module is activated
   3. Dismiss on unfocus
   4. Close all ahk process when the module exits
3. Create 2 [Measures](/coding-a-module/measures#nuol-measure)s: `ACTIONLOAD` & `ACTIONUNLOAD`, and have their `OnUpdateAction` be whatever you want


# CoreInstaller

Guide on how to use JaxCore's powerful version control tool.

## What's CoreInstaller?

CoreInstaller allows your users to install your module even without Rainmeter installed, and allows your module to self-update with a single click. This does not require JaxCore to be installed.

This is meant for advanced skin publishers only. If you're new to releasing skins, consider adding this later down your development schedule.

Complete a 3-step process for basic setup, and another 3-step process to allow your module to self-update.

## Basic setup

{% hint style="info" %}
The following section expects basic knowledge on how to setup a Github repository. If you're having trouble with this, Google's your best friend.
{% endhint %}

1. Create a Github Repository with your skin name as the repository name
2. Clone local skin folder to Github Repository. Have your skin folder as the root folder. (Optional)
3. The releases section is where you'll upload new versions of your skin. When uploading your `.rmskin` file, make sure to give the release a version tag. Documentation on how to compile your `rmskin` release can be found [here](https://docs.rainmeter.net/manual/distributing-skins/)

{% hint style="success" %}
Now your skin can be installed via the following command:
{% endhint %}

{% hint style="warning" %}
Make sure to replace any occurances of `MySkin` and `MyUser` with your Github Repo's name and your username in the sections following.

Example: If your Github username is `timmy` and your repo name is `my-first-skin`: `MyUser/MySkin --> timmy/my-first-skin`

The slash **must** be **forward**!
{% endhint %}

```powershell
$o_NoPostActions=$true;$o_InstallModule='MyUser/MySkin';iwr -useb 'https://raw.githubusercontent.com/Jax-Core/JaxCore/master/CoreInstaller.ps1' | iex
```

#### **You can also add the installation guide to your `README.md` file so it's easier for users to install your module**

1. Create a `README.md` file in the root of your skins folder
2. Put the following contents into it. :leftwards\_arrow\_with\_hook: Replace MyX

````markdown
## How to install
Run the following command in Powershell to install the latest version.

```
$o_NoPostActions=$true;$o_InstallModule='MyUser/MySkin';iwr -useb 'https://raw.githubusercontent.com/Jax-Core/JaxCore/master/CoreInstaller.ps1' | iex
```
````

## In-app updater

Complete the following setups to allow your skin to self-update. You'll need the following things in your module for it to work.

* [PowershellRM plugin](https://khanhas.gitbook.io/powershellrm/)
* A way to allow users to click on something to update
* A powershell script located in the resources folder (or anywhere within the skin)

### 1. Setup the measure in your skin

Replace `path_to_powershell_script` with corresponding path

```ini
[CoreInstallHandler]
Measure=Plugin
Plugin=PowershellRM
DynamicVariables=1
ScriptFile=#path_to_powershell_script#
ExecutionPolicy=Unrestricted
```

### 2. Setup the Powershell script

:leftwards\_arrow\_with\_hook: Replace MyX

```powershell
function Install($Version) {
    # ---------------------------------- Command --------------------------------- #
    $command = "-command `"`$o_NoPostActions=`$true;`$o_InstallModule='MyUser/MySkin';"
    $rminstalledat = join-path "$($RmAPI.VariableStr('SETTINGSPATH'))" ""
    # If installation is portable
    If (!((join-path "$Env:APPDATA\Rainmeter\" "") -eq ($rminstalledat))) {
        $rminstalledat = Split-path "$rminstalledat"
        $command += "`$o_Location='$rminstalledat';"
    }
    # If specific version is requested
    If ($Version) {
        $Version = $Version -replace 'v', ''
        $command += "`$o_Version='$Version';"
    }
    $command += "iwr -useb 'https://raw.githubusercontent.com/Jax-Core/JaxCore/master/CoreInstaller.ps1' | iex`""
    # --------------------------------- Fallback --------------------------------- #
    # Put any bangs here that should be ran everytime that you run the local updater, to let the user know what they should do if the installer doesn't work.
    # ---------------------------- Launch PS instance ---------------------------- #
    If (Test-Path "C:\Windows\System32\WindowsPowershell\v1.0\powershell.exe") {
        Start-Process "C:\Windows\System32\WindowsPowershell\v1.0\powershell.exe" -ArgumentList "-ExecutionPolicy Bypass", $command
    } else {
        Start-Process powershell.exe -ArgumentList "-ExecutionPolicy Bypass", $command
    }
}
```

### 3. Setup action in your skin

```ini
# To get the latest version
LeftMouseUpAction=[!CommandMeasure CoreInstallHandler 'Install']
# To get a specific version
LeftMouseUpAction=[!CommandMeasure CoreInstallHandler 'Install v1.5']
```